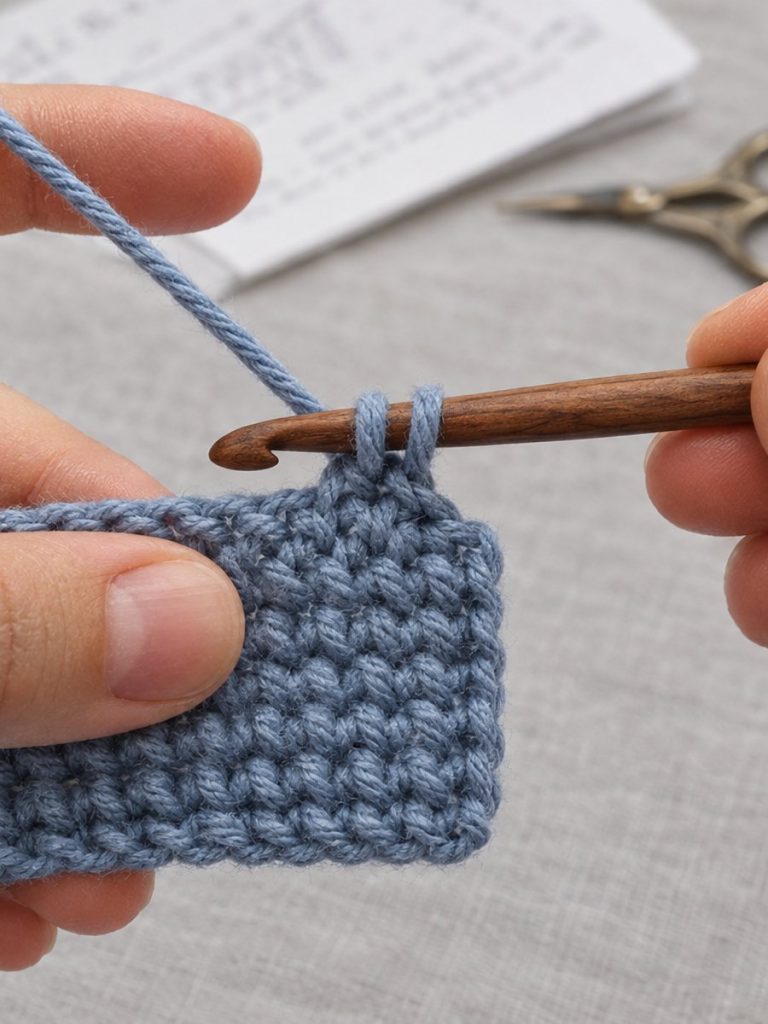
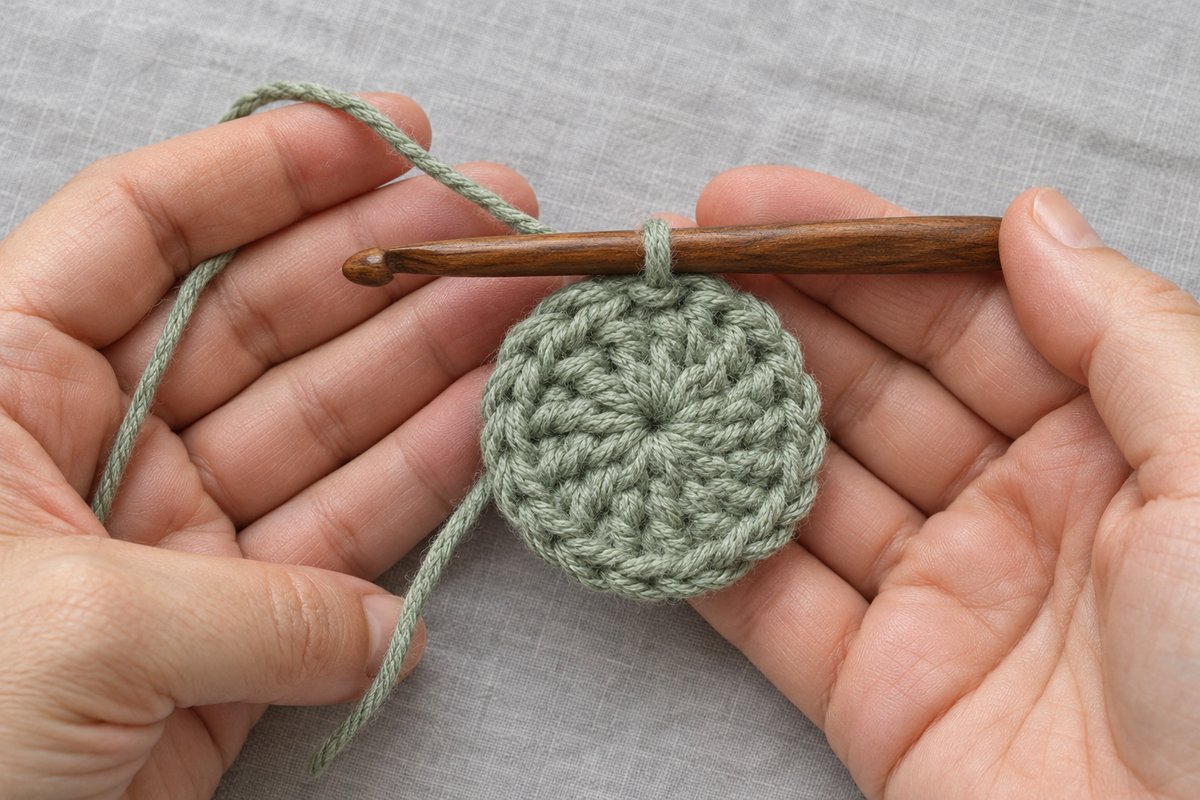
Anyone who has crocheted an amigurumi head or a top-down beanie and found a small hole in the middle has met the problem the magic ring solves. The magic ring, also called the magic circle, is an adjustable loop: the first round is worked into it, then the tail is pulled and the center closes completely. The hand movements take a little practice, but after a few attempts it becomes the default way to begin anything worked in the round.
In this post
What a magic ring is and when it is used
Magic ring, magic circle, adjustable loop
Patterns abbreviate it MR or MC and sometimes call it a magic loop or adjustable ring. All of those names describe one technique for starting in the round. Instead of chaining a few stitches and joining them into a fixed ring, the yarn is wound into a loose loop, the first round of stitches is worked over that loop, and the tail is then pulled to cinch everything shut. Because the loop tightens after the stitches are already in place, there is no hole at the center.
Reach for a magic ring whenever a pattern begins “in the round” and a closed center is wanted:
- Amigurumi heads, bodies and limbs, where stuffing would show through an open center
- Hats and beanies worked from the crown down
- Round coasters, basket bases and bag bottoms
- Flowers, circles and the centers of some granny squares
A magic ring is not needed for doilies and lace motifs designed with an open center, or when the pattern specifically says “ch 4, join with sl st to form a ring” because the hole is part of the look.
Choosing yarn and a hook to practice with
A smooth, light-colored yarn in a medium (worsted or aran) weight is the easiest to learn with. Cotton or a plain acrylic works well because every strand is easy to see and the yarn does not split. Use the hook size printed on the yarn band, typically a US H-8 (5 mm) or I-9 (5.5 mm). A hook with a slightly pointed head and a well-defined throat makes it simpler to catch the strand beneath the loop.
Fuzzy, dark or very slippery yarns are best left until the technique feels natural. Mohair and chenille hide the strands, and slick yarns can let the ring fall apart before it is locked. Once the motion is familiar, a magic ring can be made in any yarn at all.
Crochet magic ring, step by step
The steps below assume a right-handed crocheter holding the yarn in the left hand; left-handed crocheters simply mirror the hands. The ring is finished with six single crochet (UK: double crochet), the usual starting count for amigurumi.
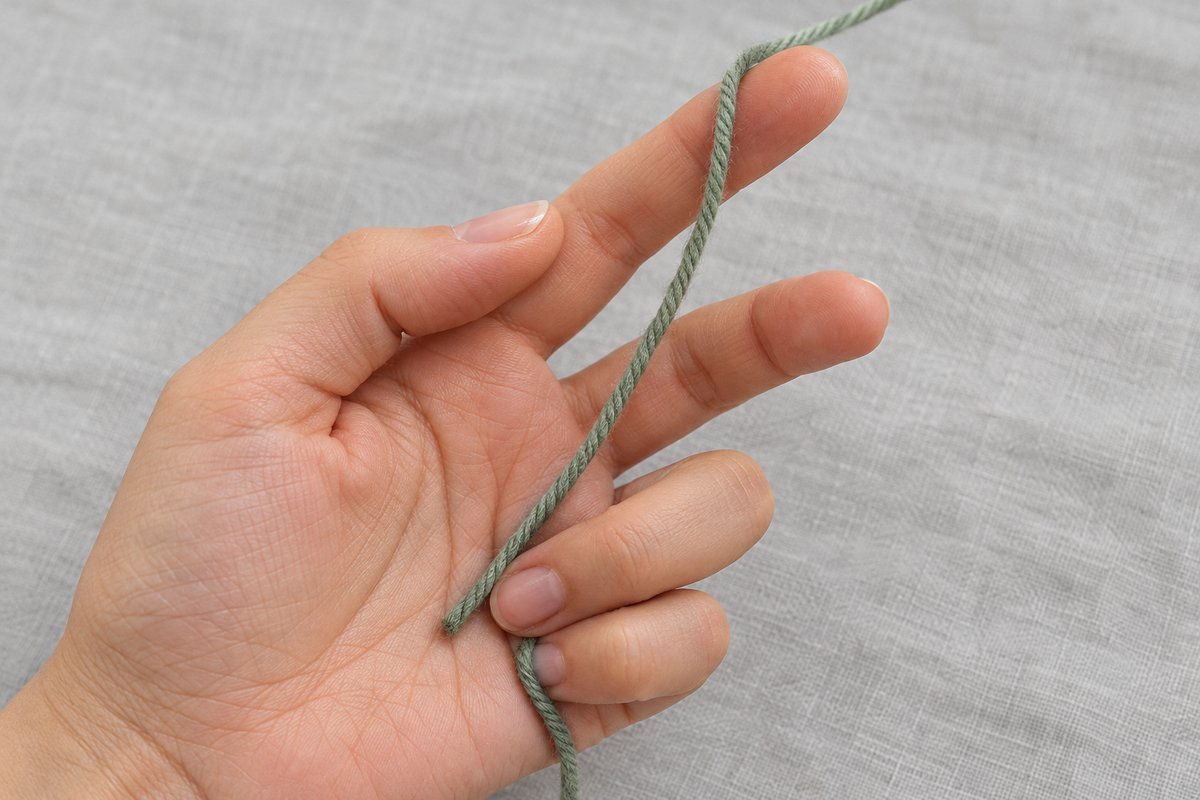
Step 1: Lay the tail across the palm
Draw roughly 6 inches (15 cm) of yarn off the skein. Turn the left palm upward and drape the yarn across it so the short tail hangs off the little-finger side and the working yarn (the strand still attached to the skein) comes from the thumb side. Trap the tail against the palm with the ring finger and little finger. Do not skimp on the tail; a tail that is too short is the number one reason a ring is difficult to close.
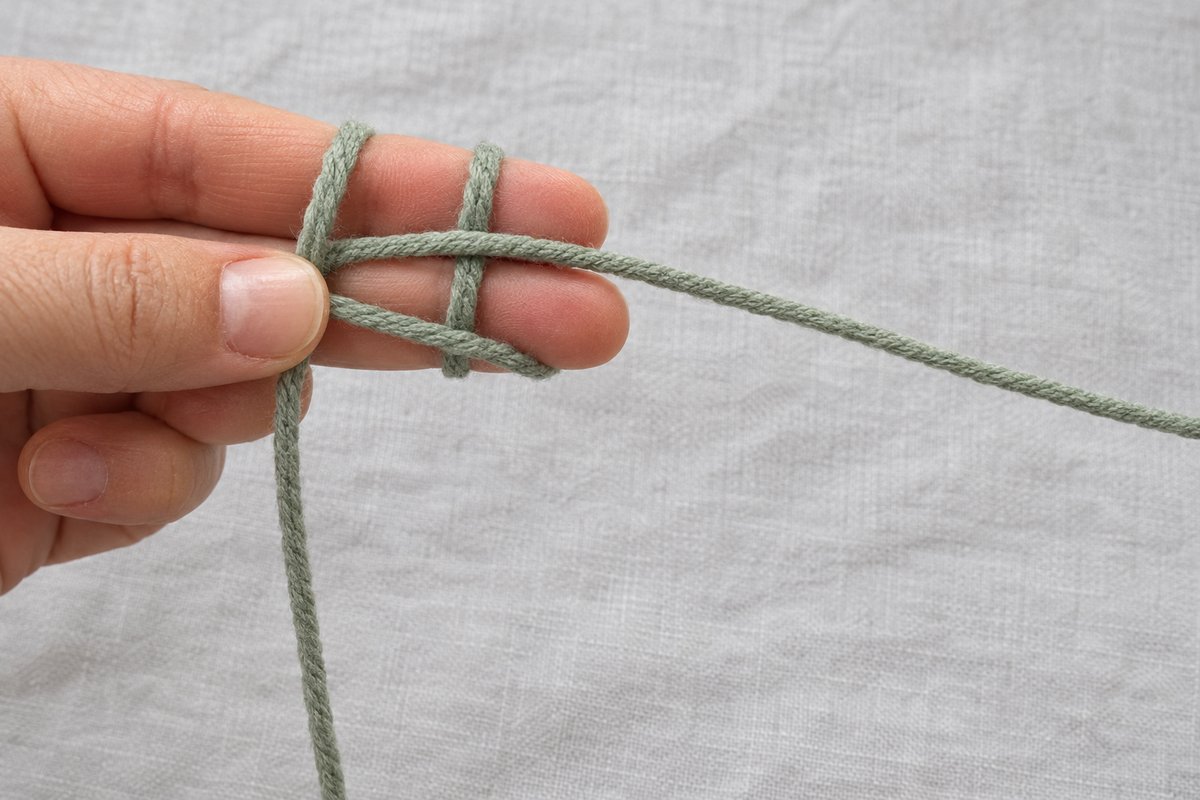
Step 2: Wind the yarn twice around two fingers
Take the working yarn up and over the index and middle fingers, around the back and across the front again, so it circles both fingers twice. Two parallel strands now cross the front of the fingers, with the working yarn finishing behind them. Pinch the spot where the strands cross with the thumb so nothing slides. A single wrap also works, but a double wrap gives a distinct first strand and second strand, which makes the next two steps much easier to see.
Step 3: Slide the hook beneath the first strand
Holding the hook in the right hand, slip it under the first strand only (the one nearest the fingertips), moving from fingertips toward the palm. That single strand should now rest on the hook, with the second strand still lying flat behind it.
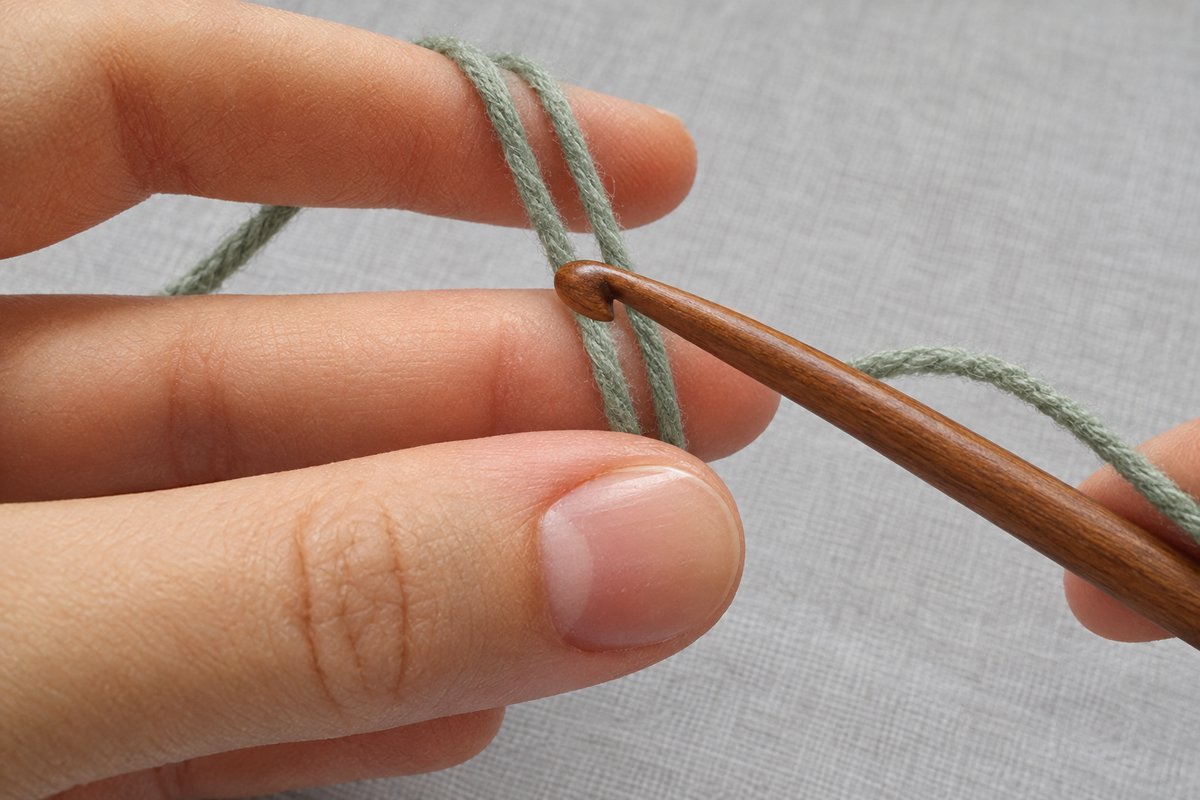
Step 4: Hook the second strand and draw it under the first
Rotate the hook so its head points downward, catch the second strand, and pull it back beneath the first strand toward you. One loop now sits on the hook while the ring of yarn remains on the two fingers. There is no need to pull hard; a loop that rests comfortably on the hook is all that is wanted.
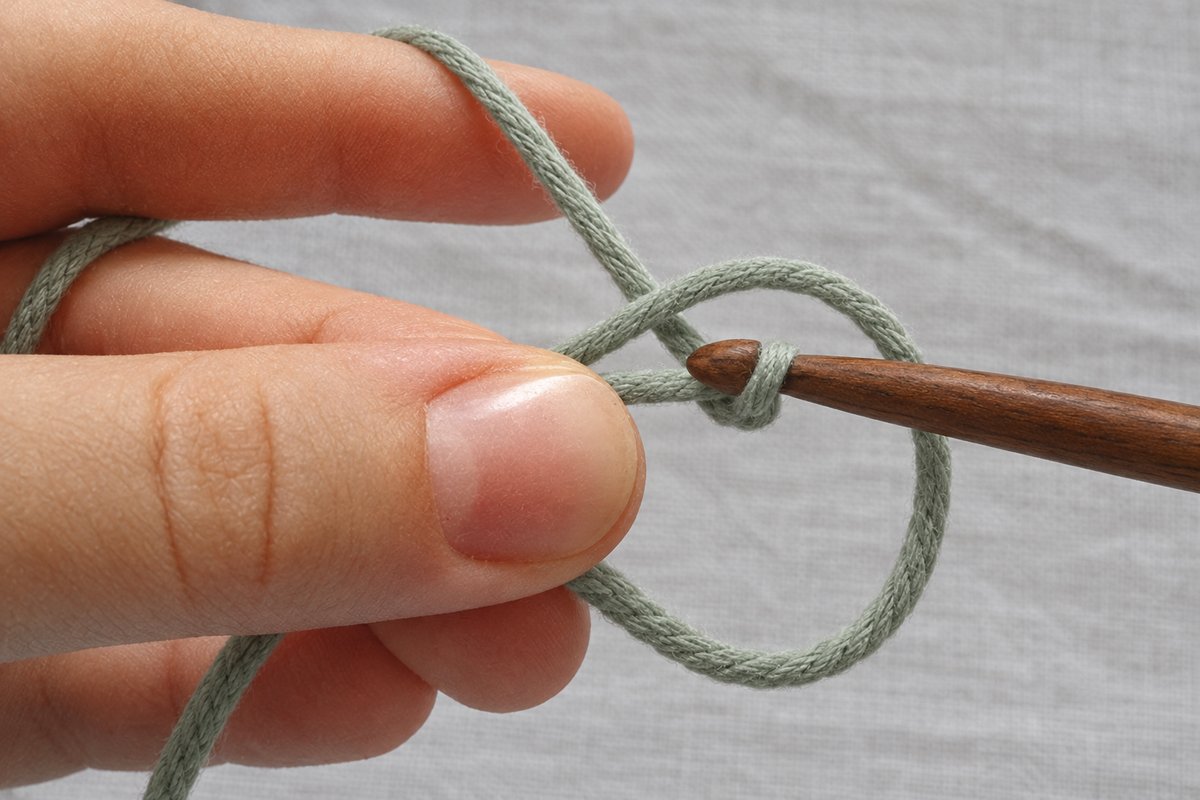
Step 5: Chain one to lock the loop
Yarn over with the working yarn and draw it through the loop on the hook. That single chain stitch locks the ring so it cannot unwind, and it does not count as a stitch. If the pattern begins with half double or double crochet rather than single crochet, chain 2 or 3 here instead, exactly as the pattern directs.
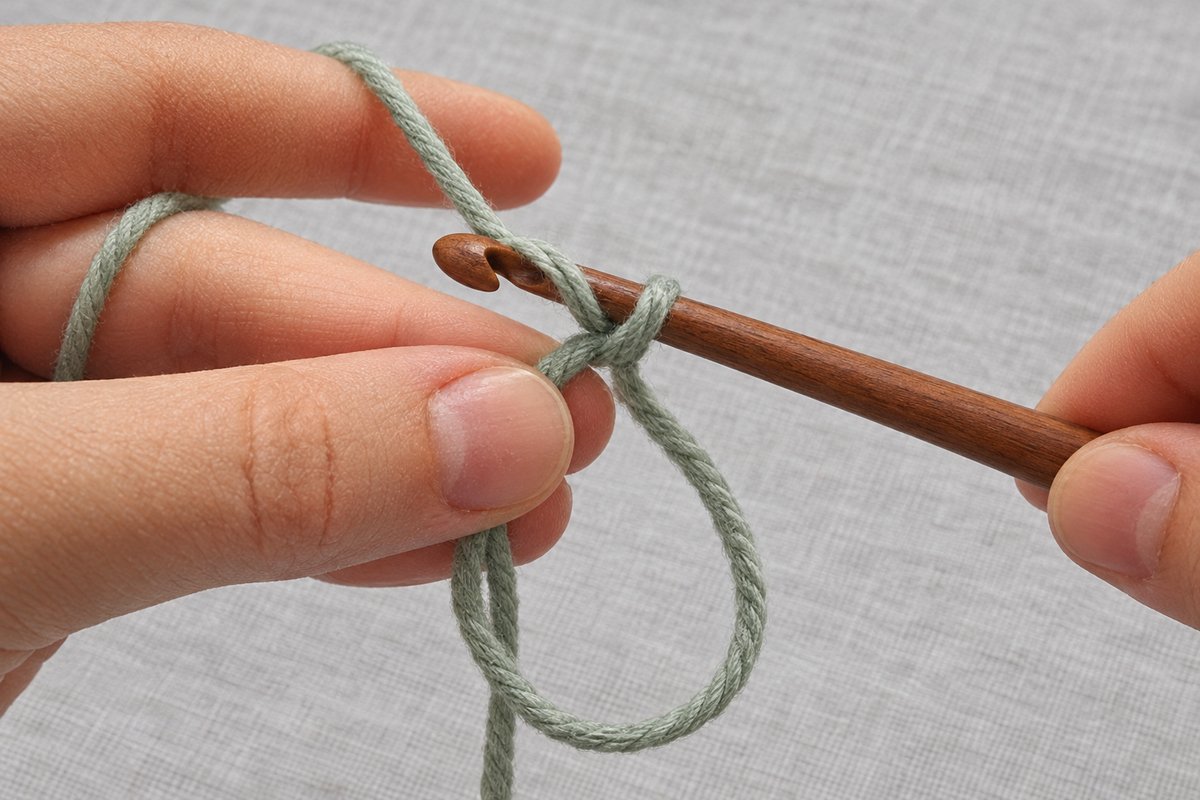
Step 6: Slip the ring off and make the first single crochet
Ease the ring off the fingers. What remains is a loose loop of yarn with the locking chain at its edge; hold the crossing point between the left thumb and index finger. Insert the hook into the center of the ring so it passes over both the ring strand and the yarn tail lying beside it. Yarn over and pull up a loop (two loops on the hook), then yarn over again and draw through both. That is the first single crochet, worked around the ring and the tail together.
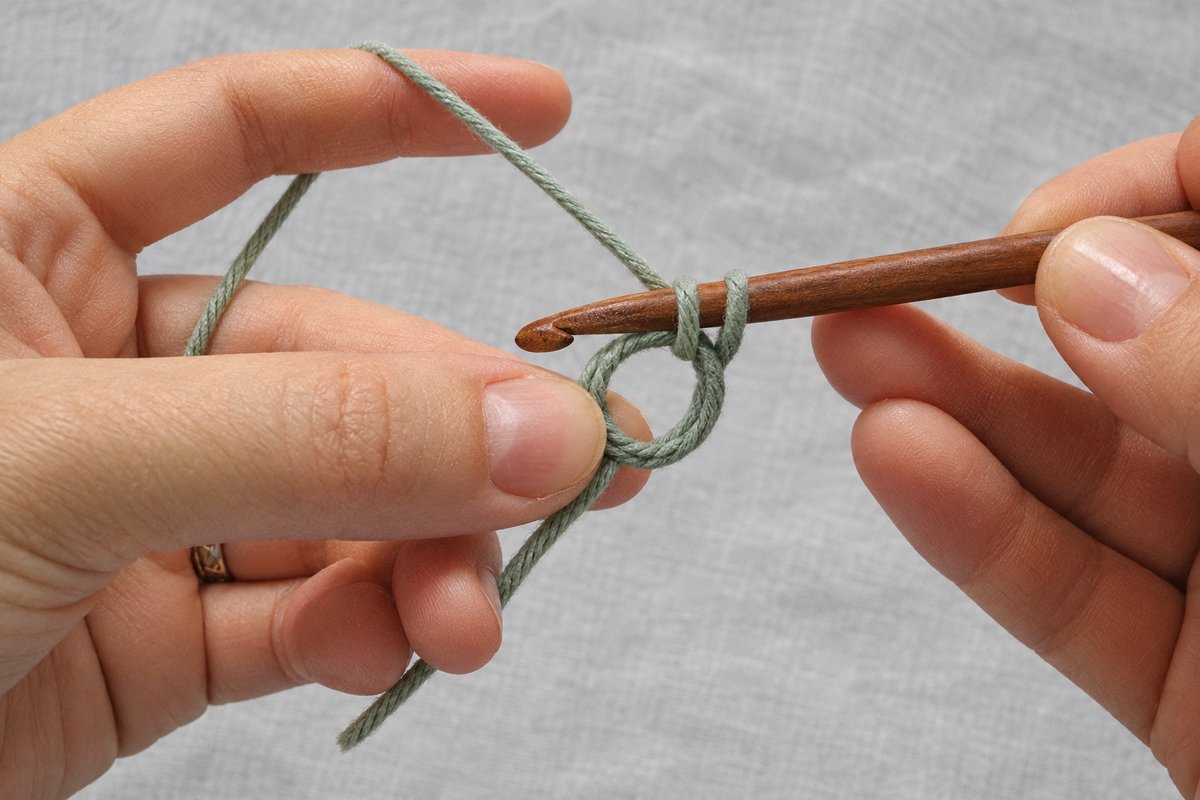
Step 7: Work the remaining stitches into the ring
Make five more single crochet in the same way, for six in total. Keep the tail lying along the ring so each stitch encloses both strands; that is what holds the ring shut later. The stitches will crowd together and the ring will look loose and floppy, which is exactly as it should be. Count the stitches now, because six is awkward to verify once the center is closed.
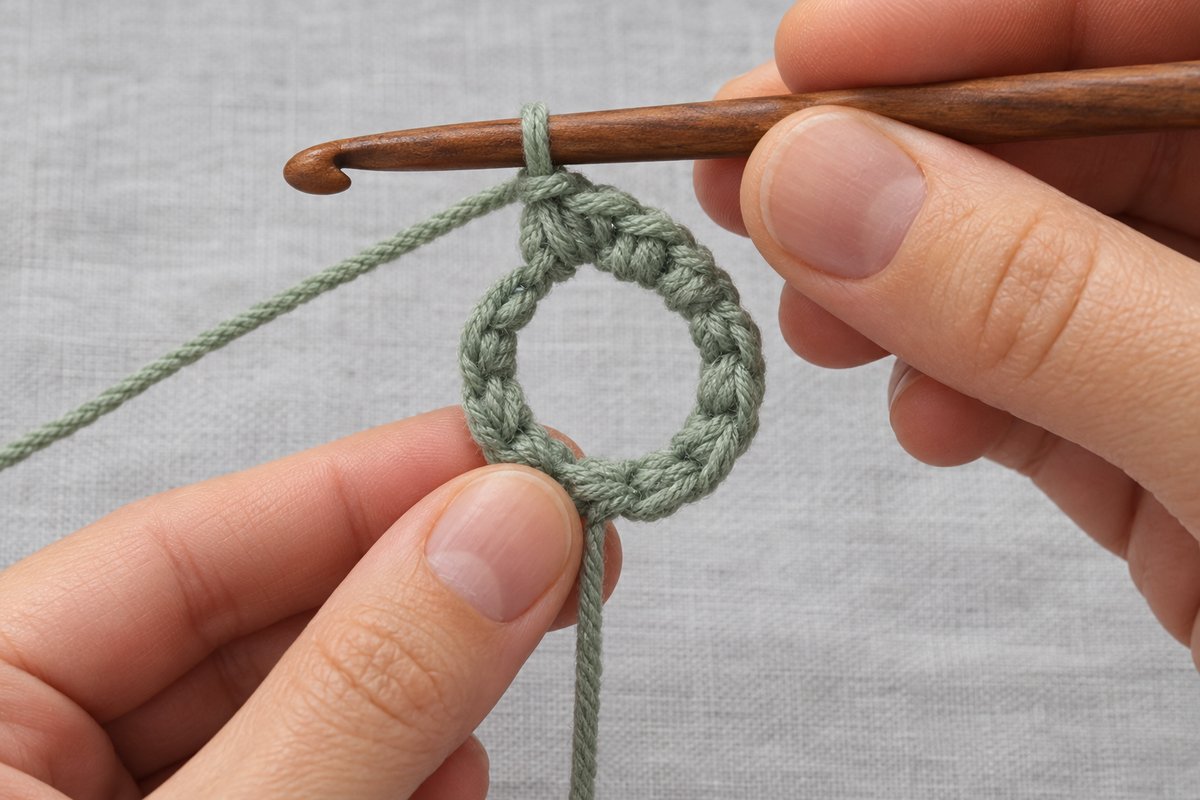
Step 8: Pull the tail to cinch the ring shut
Hold the stitches in the left hand and pull the yarn tail firmly with the right. The center draws closed and the six stitches settle into a neat little disc. With a double wrap from Step 2, pulling the tail sometimes closes one loop while a second, inner loop stays open. Locate that remaining loop in the center, tug it snug, then pull the tail a second time to finish. Keep going until no hole is visible.
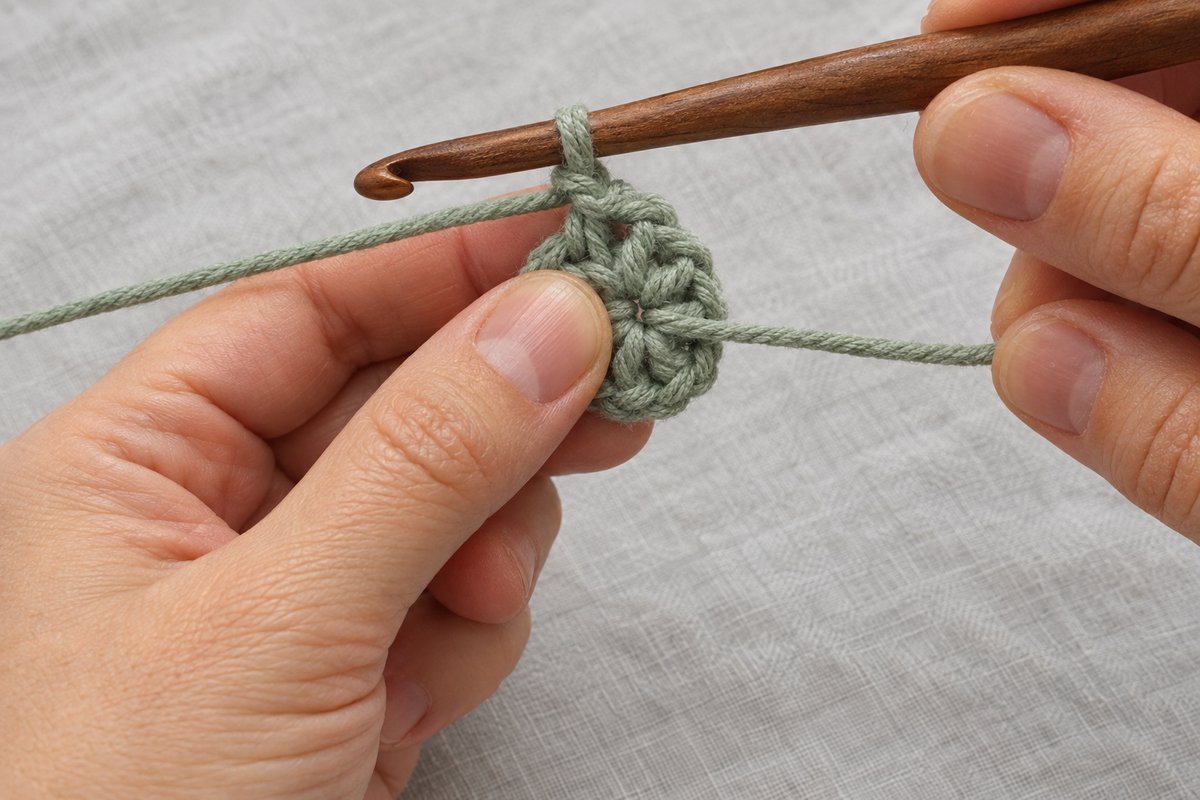
Step 9: Carry on with the pattern
The magic ring is complete. Most amigurumi patterns move straight into round 2 as a continuous spiral, with a stitch marker in the first stitch. Others call for a slip stitch join to the first single crochet before the next round begins. In either case, leave the tail alone for now: it is woven in at the very end, and until then it can be used to re-tighten the center if it loosens during the work.
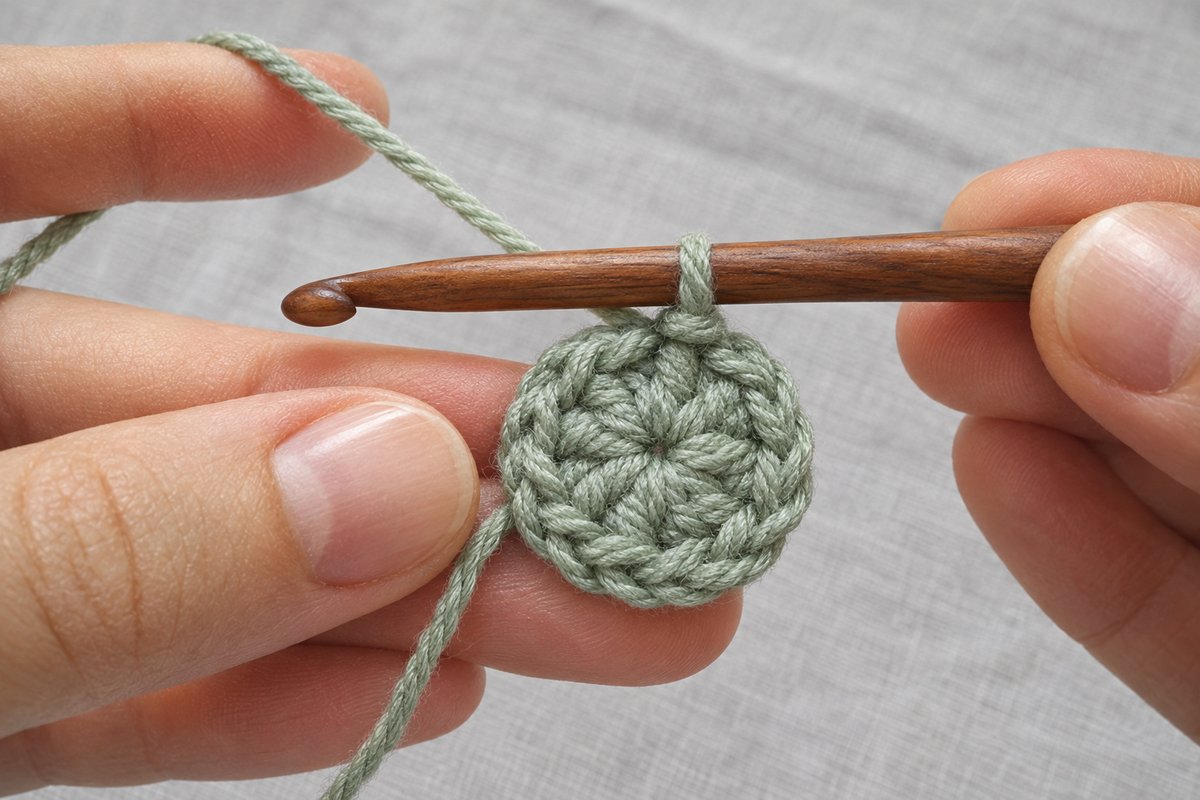
Keeping the ring closed permanently
A ring that was snug when it was made can gradually open as the piece is handled, particularly in slippery yarn or in a toy that gets played with a lot. A few habits keep it shut for good:
- Crochet over the tail. Working the first round around both the ring and the tail doubles the friction holding the center closed.
- Weave the tail in thoroughly. Once the piece is finished, thread the tail onto a yarn needle and run it through the back of the first round in one direction, then back the other way. For amigurumi, pass through a few stitches, change direction, then bury the end in the stuffing.
- Add a small knot for insurance. After weaving in, a tiny overhand knot around a stitch on the wrong side is invisible on a toy and adds security.
- Leave the tail alone once it is woven in. Pulling it at that point will not re-tighten the ring and can pucker the center.
Alternatives to the magic ring
If the magic ring refuses to cooperate, starting in the round is still possible. The chain-2 method below is the most popular substitute; the traditional “ch 4, join with sl st to form a ring” also works but always leaves a small opening.
The chain-2 method
Make a slip knot and chain 2. Insert the hook into the second chain from the hook (the first chain made, right beside the slip knot) and work every stitch of the first round into that single chain, for example six single crochet. Because all the stitches pile into one chain, the center closes nearly as tightly as a magic ring, and a tug on the tail snugs it further. The method is fast, stable and a sensible choice for beginners and for yarns that will not hold a magic ring.
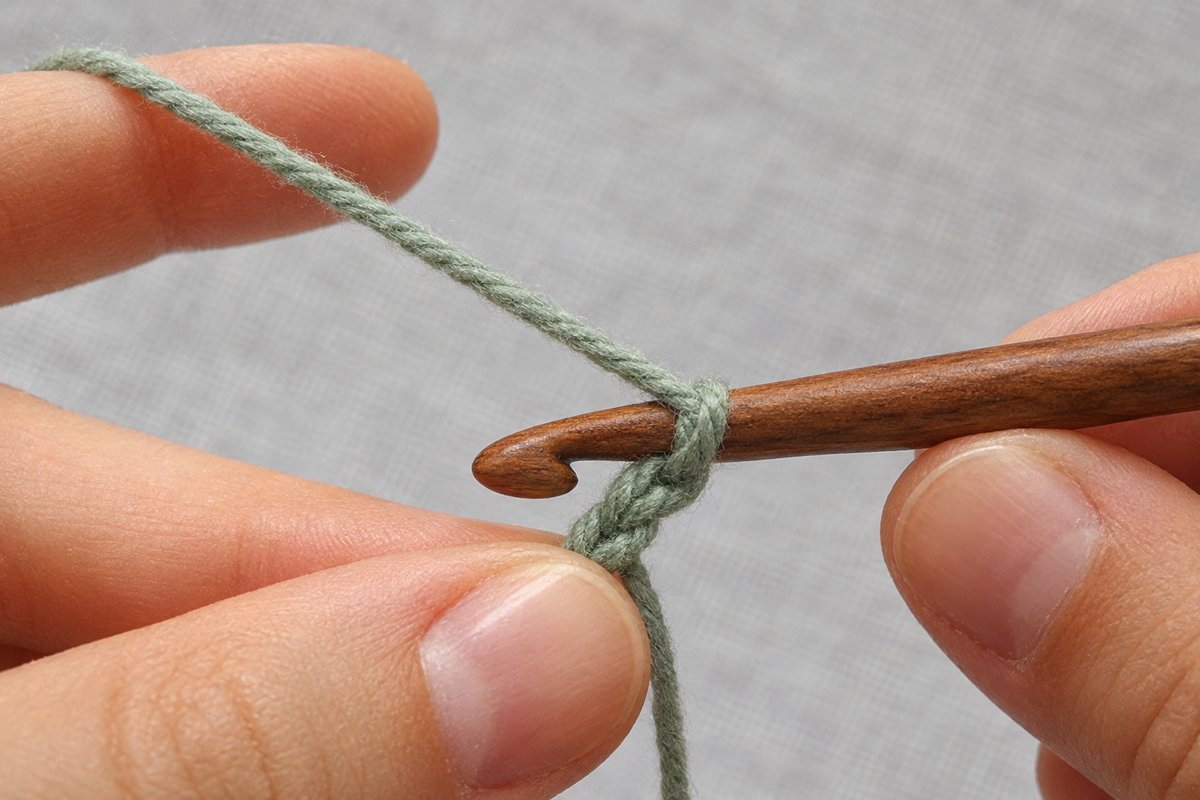
Troubleshooting a ring that loosens or will not close
- Pulling the tail has no effect. The stitches were most likely worked over the working yarn instead of the tail, or the tail slipped out from beneath them. Undo the round and make sure the tail runs along the ring as the stitches are made.
- The ring closes part way and stops. A double wrap creates two loops to close. Pull the tail until it stops, find the remaining loop in the center and tug it, then pull the tail again.
- The ring falls apart when it comes off the fingers. The locking chain in Step 5 was skipped, or the hook passed over the second strand rather than under the first. Start over and watch the yarn path in Steps 3 and 4.
- The center reopens later. The tail was woven in too loosely or was too short. Next time, leave a longer tail, weave it in two directions and add a small knot on the wrong side.
- The first round looks uneven. The stitches were different sizes, or only some of them were worked over the tail. Consistency comes with repetition; make several rings in a row and compare them.
Frequently asked questions
How many stitches go into a magic ring?
As many as the pattern calls for. Six single crochet is the standard start for amigurumi spheres, 8 or 10 for a hat crown in half double or double crochet, and 12 double crochet for flat circles and some square centers.
Is a magic circle different from a magic ring?
No. Magic ring, magic circle, magic loop and adjustable ring are all names for the same technique. Patterns abbreviate it MR, MC or occasionally “adjustable loop”.
Can the magic ring be made left-handed?
Yes. Hold the yarn in the right hand and the hook in the left, and follow the same steps as a mirror image. Viewing the photos in a mirror can help if they are hard to translate.
Why is there still a hole in the magic ring?
Either the ring was never fully closed (look for a second inner loop if the yarn was double-wrapped) or the tail has worked loose. Pull the tail again before weaving it in, and weave the end in two directions.
Is a magic ring required for a hat?
Not strictly, though it produces the tidiest crown. The chain-2 method is a fine alternative for hats, and the opening left by a chain-4 ring can be closed afterward with the yarn tail with a little patience.
Next step
With the ring mastered, the next skill is following the rounds that come after it. The Savor Queen guide on how to read crochet patterns covers abbreviations, stitch counts, repeats and gauge in plain language, with a sample pattern explained line by line.