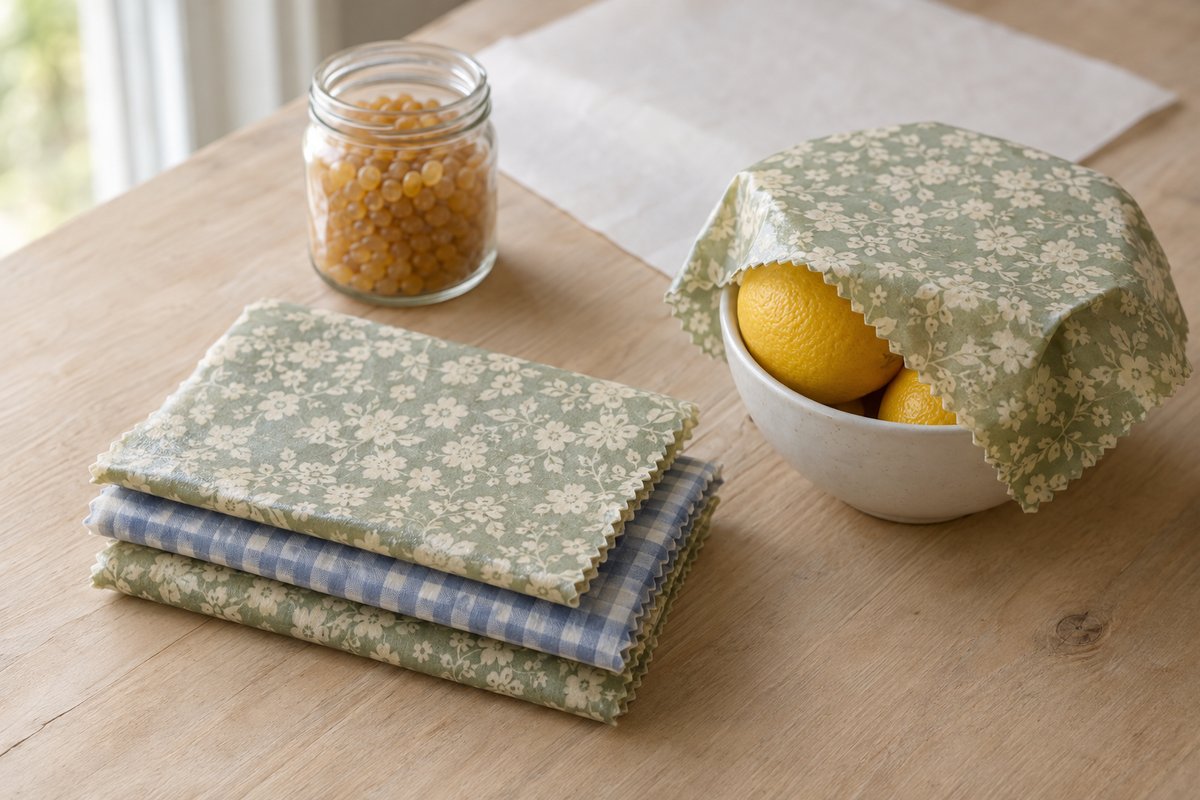
Beeswax wraps are squares of cotton coated in a thin layer of beeswax, pine resin and jojoba oil. The warmth of your hands softens the coating so the fabric molds around a bowl, a sandwich or a cut lemon and holds its shape as it cools. They replace plastic wrap for most everyday jobs, last about a year, and go into the compost when they wear out. Making them at home costs a fraction of the shop price, and a set of five or six takes under an hour.
In this post
What you need
The quantities below make a set of six wraps: two small, two medium, one large and one bread wrap. Weights are more reliable than cups for wax, so use a kitchen scale.
| Material | Quantity | Approximate cost |
|---|---|---|
| 100% cotton fabric (quilting weight, prewashed) | 1 yard (90 cm), or 4 fat quarters | $8-12 |
| Beeswax pellets (yellow or white) | 3.5 oz (100 g) | $3-4 (from a 1 lb bag at $12-18) |
| Pine resin (powdered or finely crushed) | 0.9 oz (25 g) | $2-3 (from a 4 oz jar at $8-12) |
| Jojoba oil | 0.9 oz (25 g, about 5 teaspoons) | $1-2 (from a 4 oz bottle at $8-10) |
| Parchment paper | 1 roll | $3-5 |
Tools: a rimmed baking sheet or small enamel tray, pinking shears, a ruler and fabric marker, a wide natural-bristle brush (about 1.5 inches / 4 cm) kept for wax only, a clean tin can for melting, a kitchen scale, oven mitts, tongs, and a drying line or chair back to hang the wraps while they set. The iron method also needs an iron, an old towel and extra parchment.
Everything is sold at craft and fabric shops, soap-making suppliers and online. Look for cosmetic- or food-grade beeswax, pine resin (also sold as rosin or colophony) that is already powdered, and pure jojoba oil. Material cost for the full set is roughly $8-10, against $18-25 for a comparable set bought ready made.
Before you start
Choose and prepare the fabric
Only 100% cotton works. Quilting cotton is ideal: thin enough to absorb the wax, tightly woven enough that the coating stays even, and sold in every print imaginable. Avoid polyester blends, flannel and anything heavy or stretchy. Wash the fabric in hot water without fabric softener, dry it and iron it flat. Sizing and softener residue stop the wax from bonding, which is the most common reason homemade wraps fail.
Safety and setup
Beeswax melts at about 145°F (63°C) and becomes a fire risk well above 400°F (200°C), so keep the oven at or below 200°F (95°C) and never leave melting wax unattended. Melt the blend in a double boiler (a can standing in a pot of simmering water), never directly on the burner or in the microwave; resin can spit and scorch. Pine resin will not wash off tools, so set aside a brush, a can and a spoon for this job only. Lay newspaper under the work area and open a window, because warm resin has a strong pine smell. Allow 45-60 minutes for a set of six.
Beeswax wraps, step by step
The main method uses a low oven, which gives the most even coating. Step 7 covers the iron method for anyone without an oven.
Step 1: Cut the fabric to size
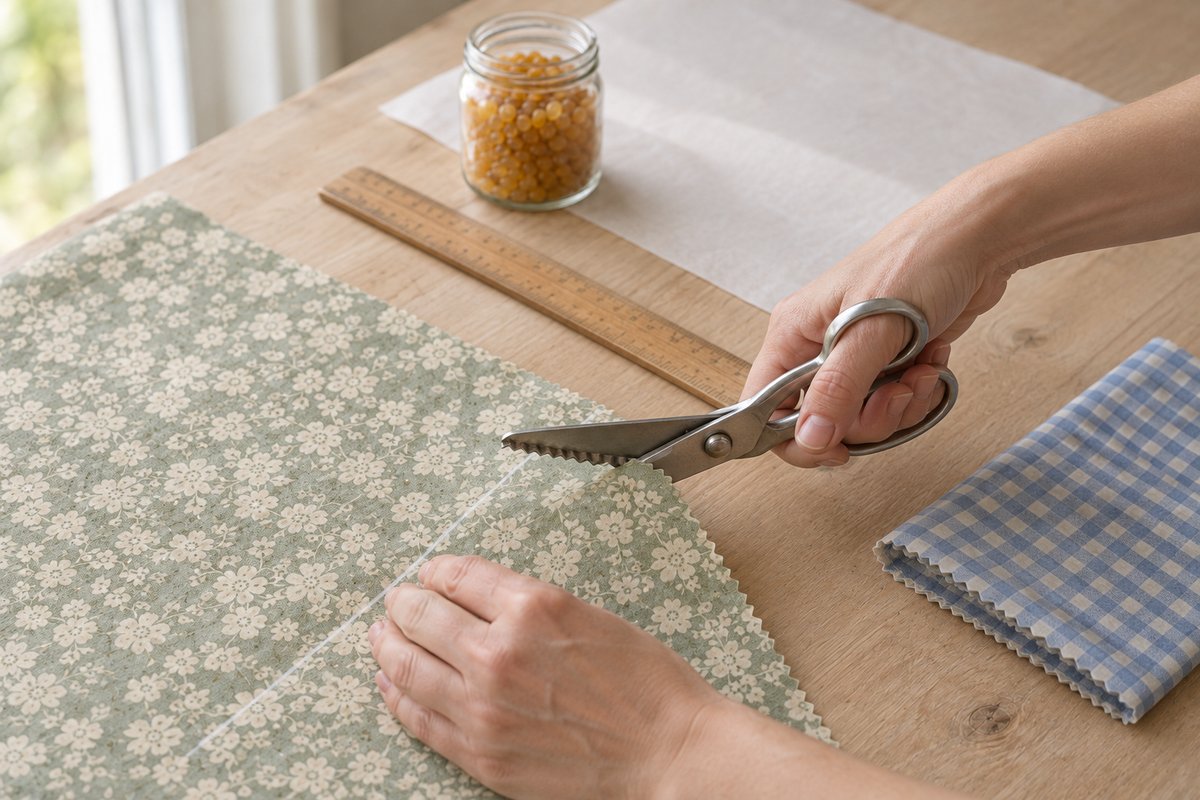
Measure and mark the squares on the wrong side of the fabric, then cut every edge with pinking shears. The zigzag edge stops fraying without a hem, which would be too thick to coat. Useful sizes: 7 x 7 inches (18 x 18 cm) for half a lemon, a jar top or a small bowl; 10 x 10 inches (25 x 25 cm) for sandwiches and cereal bowls; 13 x 13 inches (33 x 33 cm) for large bowls, half a melon or a casserole; and 14 x 18 inches (35 x 45 cm) for a loaf of bread. Cut each square about half an inch (1 cm) smaller than your baking tray so it lies flat.
Step 2: Weigh and melt the wax blend
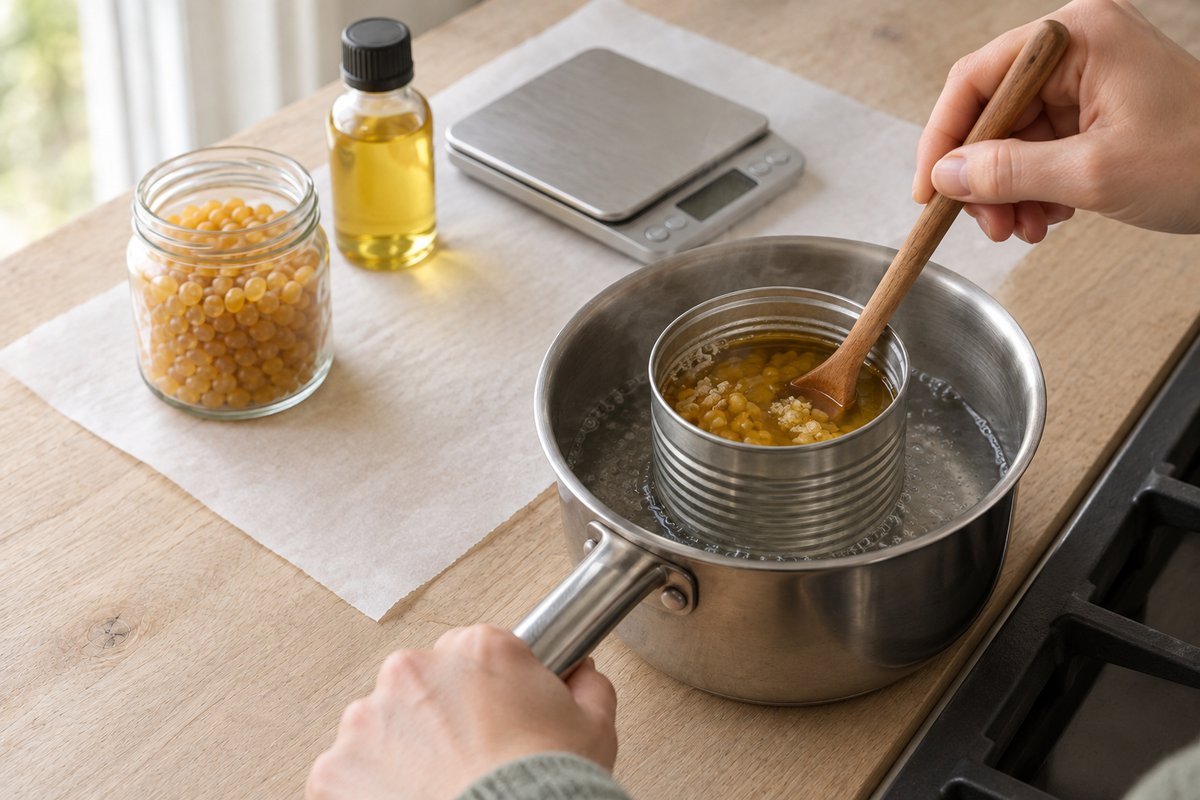
The standard ratio is 4 parts beeswax, 1 part pine resin and 1 part jojoba oil by weight. For this set weigh 100 g (3.5 oz) beeswax, 25 g (0.9 oz) resin and 25 g (0.9 oz) jojoba into the can. Stand the can in a pot with 2 inches (5 cm) of simmering water and stir every minute or two with the dedicated spoon. The wax melts in about five minutes; the resin takes longer, up to 15 minutes, and the blend is ready when it is clear amber with no cloudy specks. Keep the water at a gentle simmer, not a rolling boil. Preheat the oven to 185-200°F (85-95°C) while it melts.
Step 3: Brush the blend onto the first square
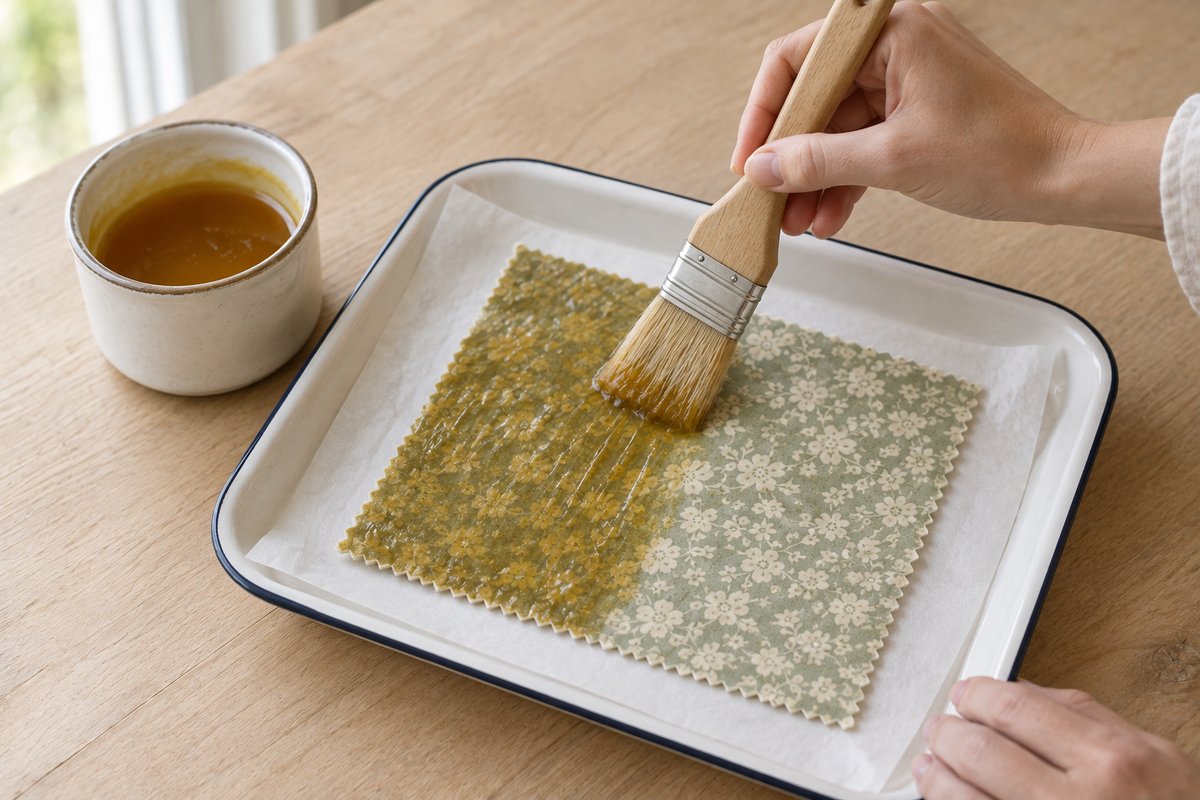
Line the tray with parchment and lay the first fabric square on it, right side up. Dip the brush and paint the melted blend over the whole surface in quick strokes, working from the center outward and all the way to the pinked edge. It will set almost immediately and look streaky and patchy; that is fine, because the oven evens it out. Aim for a thin, complete layer: about 12-15 g (0.4-0.5 oz) of blend for a 10-inch square, roughly a tablespoon and a half. Too much makes a stiff, tacky wrap that cracks; too little leaves dull, uncoated patches that will not cling.
Step 4: Melt the coating in the oven
Put the tray in the oven for 4-6 minutes. Watch through the door: the streaks disappear and the fabric turns uniformly darker and glossy as the wax soaks in. Pull it out as soon as the whole square is wet-looking. Leaving it a minute longer does no harm at this temperature, but hotter ovens darken the resin and can scorch the parchment. If any area still looks pale and dry, dot a little more blend on it with the brush and return the tray for two minutes. If a pool of excess wax has collected in one spot, brush it toward the dry corners.
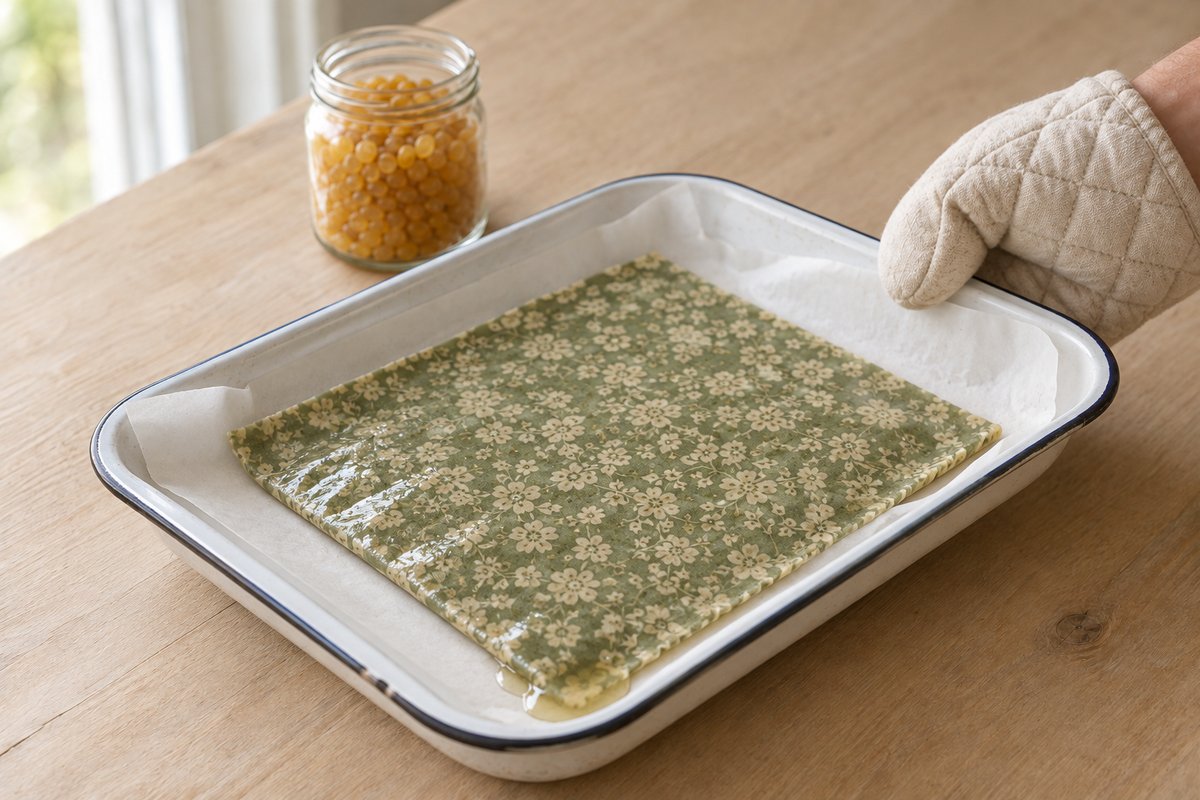
Step 5: Spread, lift and hang to set
While the wrap is still hot, give the surface one last pass with the brush to spread the coating evenly to every edge. Then pick the square up by two corners with tongs or your fingertips (the fabric cools in seconds and is only warm, not hot, but the wax pooled on the tray stays hotter) and wave it gently in the air for 10-20 seconds. It stiffens as it cools. Hang it over a drying line, a clothes horse or the back of a chair, with parchment underneath to catch drips, for five minutes. Do not lay wraps on top of each other until they are fully cool or they will fuse.
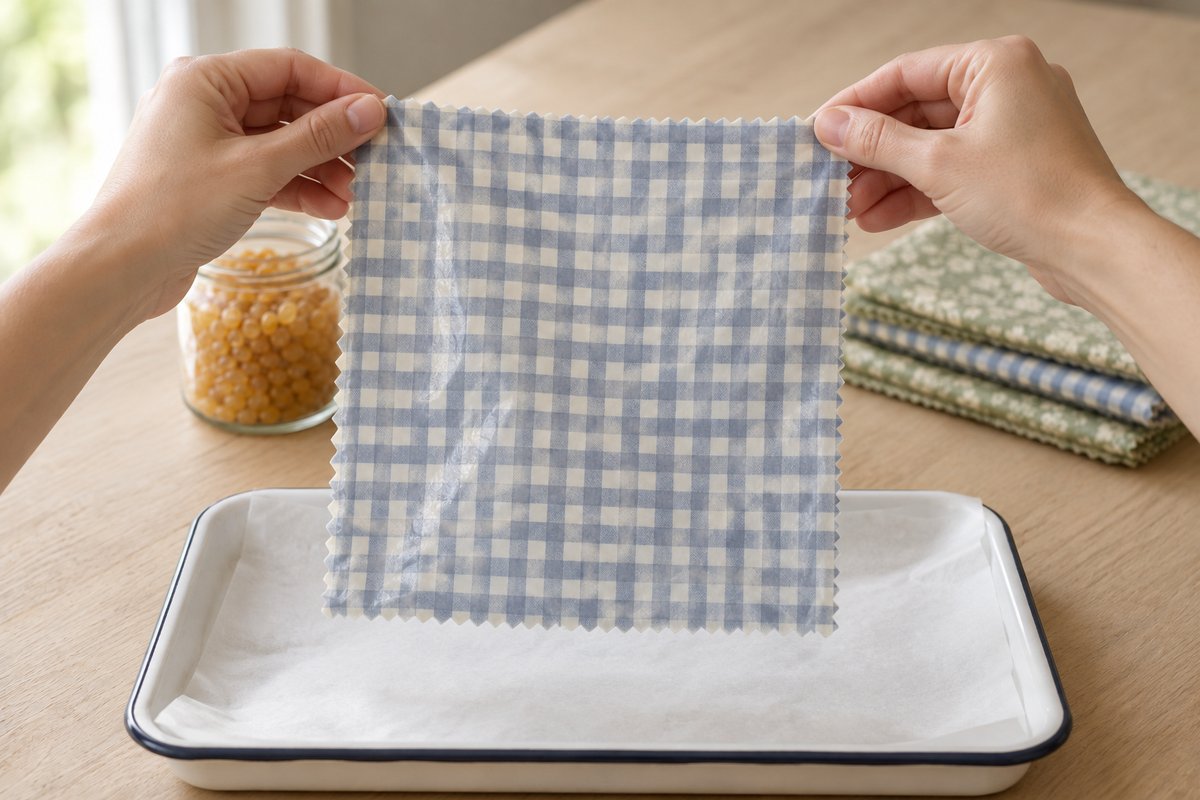
Step 6: Coat the remaining squares
Repeat Steps 3 to 5 with each square. The same sheet of parchment can be reused for the whole batch; the wax that collects on it is picked up by the next square, so each one needs a little less fresh blend. If the blend in the can begins to thicken, return it to the simmering water for a minute. For the large bread wrap, which will not fit a standard tray flat, fold the fabric in half on the parchment, coat both faces, then open it out and return it to the oven for two minutes so the fold line melts smooth. Hold each finished wrap up to the window: it should look evenly glossy with no matte patches.
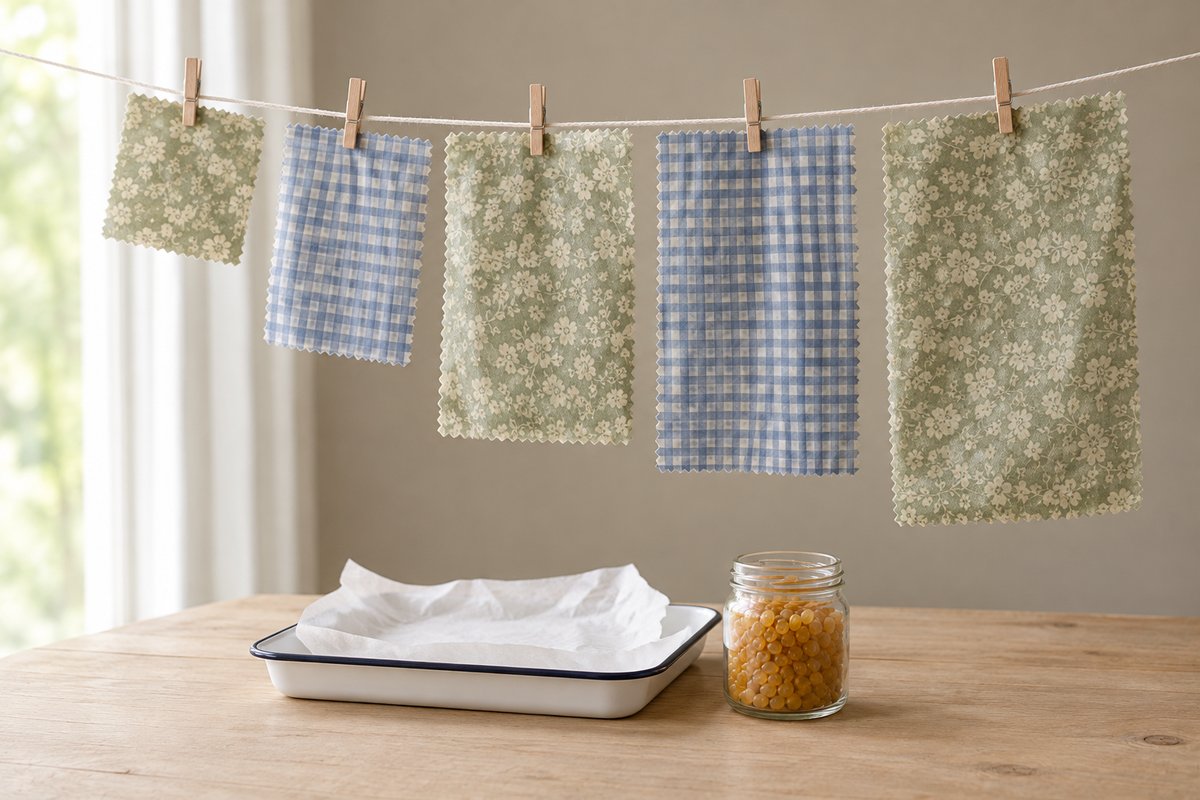
Step 7: The iron method (and a quick test)
Without an oven, lay a towel on the counter, then parchment, then the fabric square. Sprinkle beeswax pellets evenly over it, about 1 tablespoon per 10-inch square, with a pinch of powdered resin and a few drops of jojoba if you are using them. Cover with a second sheet of parchment and press with an iron on the cotton setting, no steam, moving constantly, until the wax has melted and spread to the edges, about one minute. Peel the fabric away while warm and hang it. Whichever method you use, test a cool wrap by scrunching it over a bowl rim: it should hold its crease and cling after a few seconds of hand warmth.
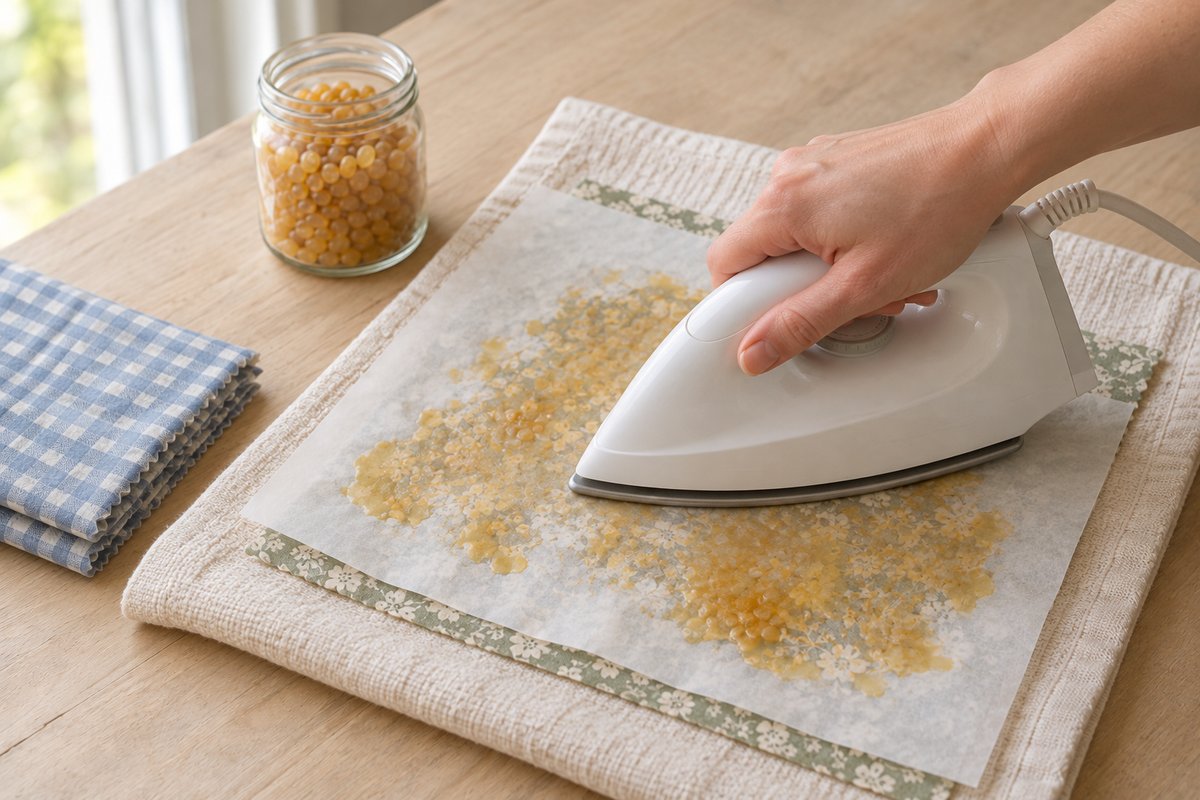
Tips for a better result
- Measure resin by weight, not volume. Powdered resin packs differently from crushed, and too much makes a wrap that feels like tape and leaves residue on bowls.
- Keep the layer thin. A good wrap is flexible and slightly translucent. Wax sitting on the surface rather than in the weave means it is too thick.
- Let them cure overnight. Wraps are usable as soon as they are cool, but the coating hardens fully over 12-24 hours and clings better from then on.
- Save the leftovers. Pour any remaining blend onto parchment, let it set, and keep the block for refreshing wraps later. Beeswax pellets from the same bag also go into the mason jar soy candle blend and firm up a homemade sugar scrub.
Troubleshooting
The wrap is stiff and cracks when folded
Too much wax, or no jojoba. Lay the wrap on fresh parchment in the 185°F (85°C) oven for two minutes, then press a clean square of prewashed cotton on top to blot the excess. If the blend had no oil, brush on a few drops of jojoba before reheating.
The wrap is sticky and leaves residue on bowls
Too much resin or oil. Reheat and blot as above, then make the next batch at 5:1:1. A little tack is normal in the first week and settles as the wrap cures.
Pale, dry patches that will not cling
Uneven coating, or fabric that still carried sizing or softener. Dot more blend onto the dry spots and return to the oven for two minutes. If the wax beads up on the surface rather than soaking in, wash the fabric again in hot water with no softener and start over.
The blend will not clear and has grainy specks
Resin that has not fully melted. Keep stirring over the simmering water; large chunks can take 20 minutes. Next time buy powdered resin or crush lumps in a bag with a hammer.
Variations
- Wax-only wraps. Skip the resin and oil. The wrap is stiffer and less clingy but faster to make and odor free; it suits jar covers and bread better than bowls.
- Vegan wraps. Replace beeswax with candelilla wax at the same weight, keeping the resin and jojoba. Candelilla is harder, so increase the jojoba to 1.5 parts.
- Snack bags. Fold a 10 x 13 inch (25 x 33 cm) coated rectangle in half, warm the two side edges between your fingers and press them together for a sealed pouch with an open top.
- Gift sets. Roll three wraps in small, medium and large, tie with jute twine, and tuck in a slice from a dried orange slice garland for a kitchen gift under $5.
How to use, store and care for it
Press the wrap around a bowl or around food with your hands and hold for a few seconds; body heat softens the coating enough to seal. Use them for cheese, bread, cut fruit and vegetables, sandwiches, herbs and bowls of leftovers or dough. Do not use them for raw meat, fish or eggs, because the wraps cannot be washed hot enough to sanitize them, and never wrap hot food or put them in the oven, microwave or dishwasher, since anything above about 120°F (50°C) melts the coating.
Wash in cool water with a drop of mild dish soap, wiping with a soft cloth, and air dry on a rack. Never use hot water. Store the wraps flat in a drawer or rolled in a jar away from sunlight and heat. With daily use a wrap lasts around a year. When it looks dull and creased and no longer clings, refresh it: lay it on parchment in a 185°F (85°C) oven for 2-3 minutes, brush on a little saved blend if the coating is thin, and hang to cool. Once too worn to refresh, cut it into strips for the compost, or roll the strips tightly as natural fire starters.
Frequently asked questions
Can beeswax wraps be made without pine resin?
Yes. Beeswax on its own makes a usable wrap that is stiffer and less sticky. The resin provides the tack that lets a wrap seal onto a bowl and onto itself, so wax-only wraps suit jars, bread and cheese better than bowl rims.
What temperature should the oven be for beeswax wraps?
Between 185 and 200°F (85-95°C) for 4-6 minutes. Beeswax melts at about 145°F (63°C), so a low oven is plenty. Hotter ovens darken the resin and scorch the parchment, so use the lowest setting and never leave it unattended.
Why do homemade beeswax wraps not stick?
Usually because there is no resin in the blend, the fabric was not prewashed, or the coating is too thin. Add resin at 4:1 wax to resin by weight, wash fabric in hot water without softener, and make sure the wrap looks glossy edge to edge after the oven.
Are beeswax wraps safe for food?
Yes, when made with cosmetic- or food-grade beeswax, food-safe pine resin and pure jojoba oil, the same ingredients used in commercial wraps. Keep them away from raw meat, fish and eggs, and wash after every use. Anyone with a bee product allergy should avoid them.
How much wax does one wrap need?
Roughly 12-15 g (0.4-0.5 oz) of blend for a 10-inch square, 20-25 g for a 13-inch square and 30-35 g for a bread wrap. The 150 g batch above coats a six-wrap set with some left over.
Can the wraps go in the freezer?
Yes, for a few weeks. The coating becomes brittle when very cold, so let the wrap sit at room temperature for a minute before unfolding it to avoid cracks.
More to make
The leftover beeswax and the low-oven habit carry straight into DIY mason jar soy candles and a dried orange slice garland, and homemade sugar scrub uses the same jojoba oil. For a rainy afternoon with children, try salt dough ornaments, or hang a plant in a macramé plant hanger for beginners. If yarn is more your thing, the how to crochet guides start from the first stitch.